1. Publish your project
Before embedding your data feature, you will need to publish your project. You can do this via the following steps: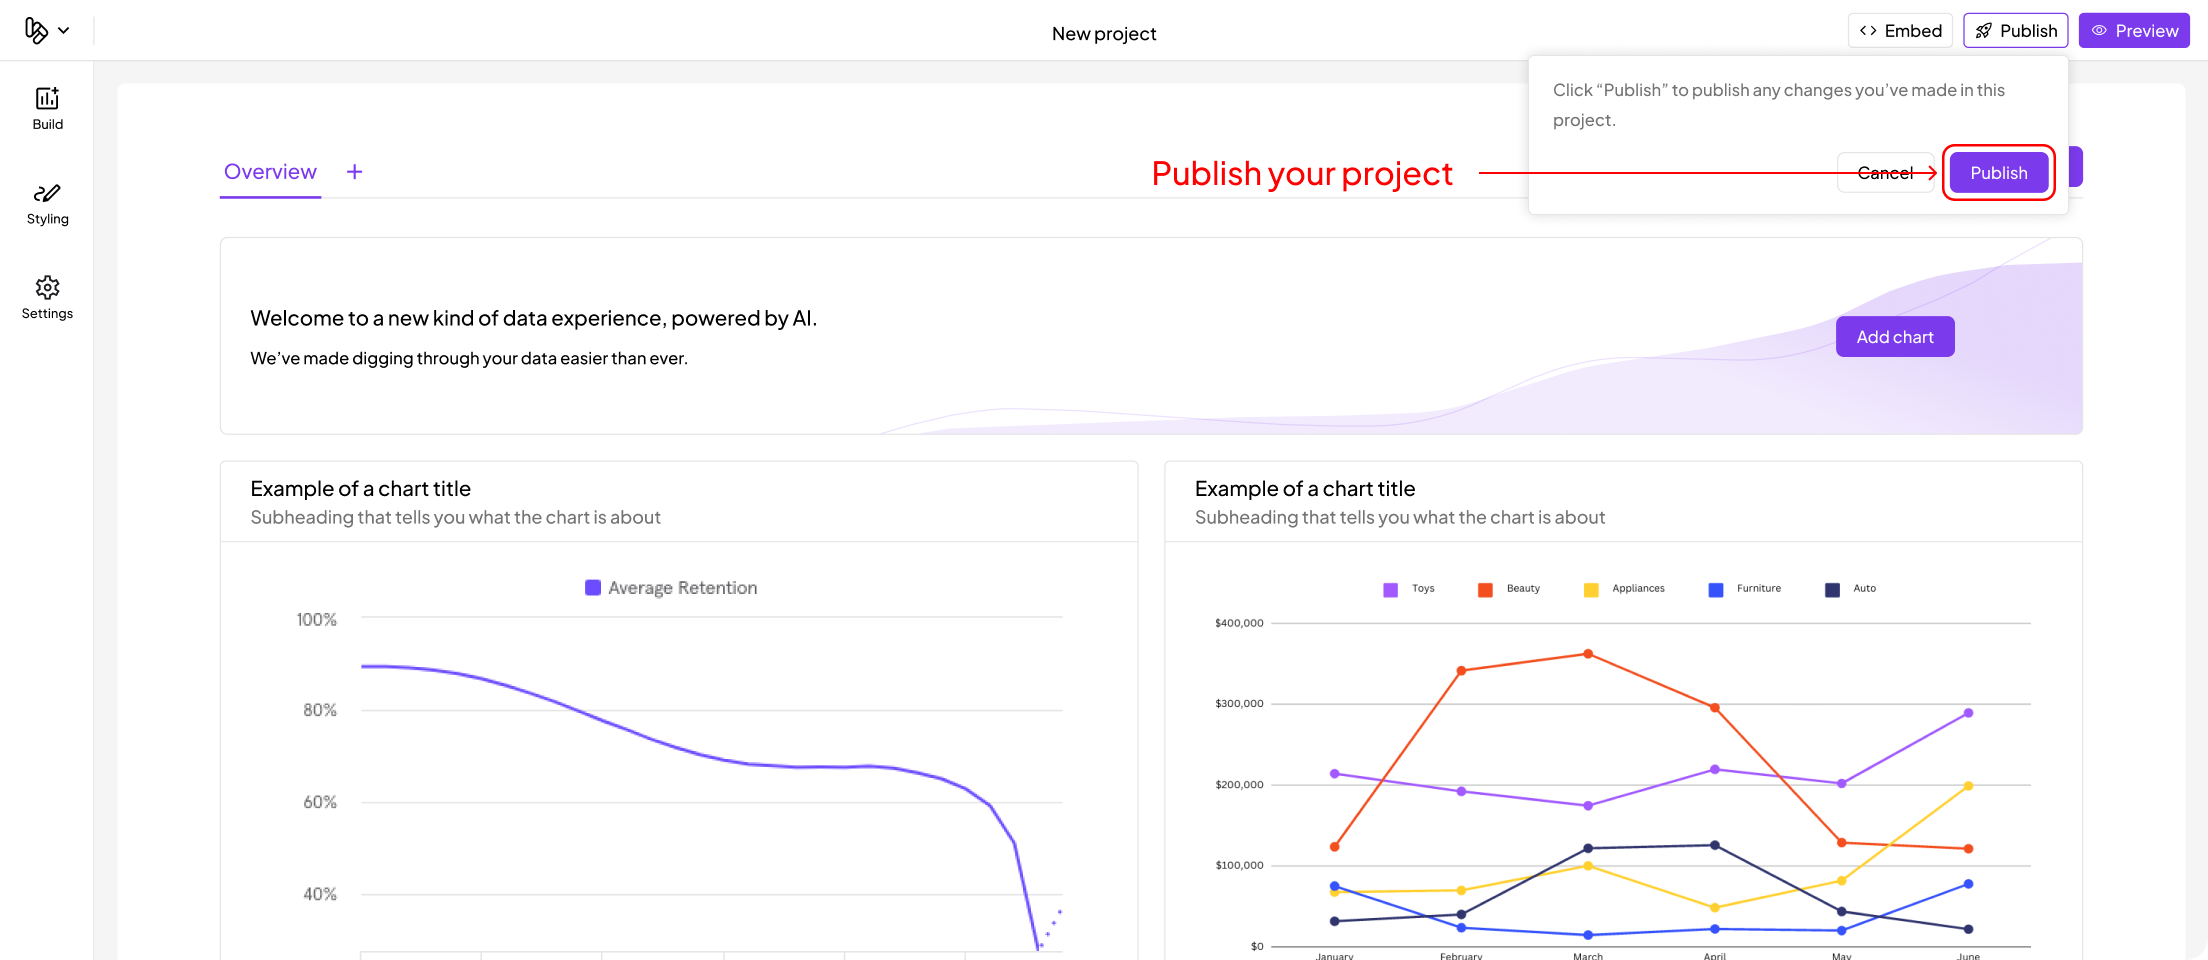
2. Get embed code
iFrame
Once a project is published, you can copy the iFrame code snippet via the following steps: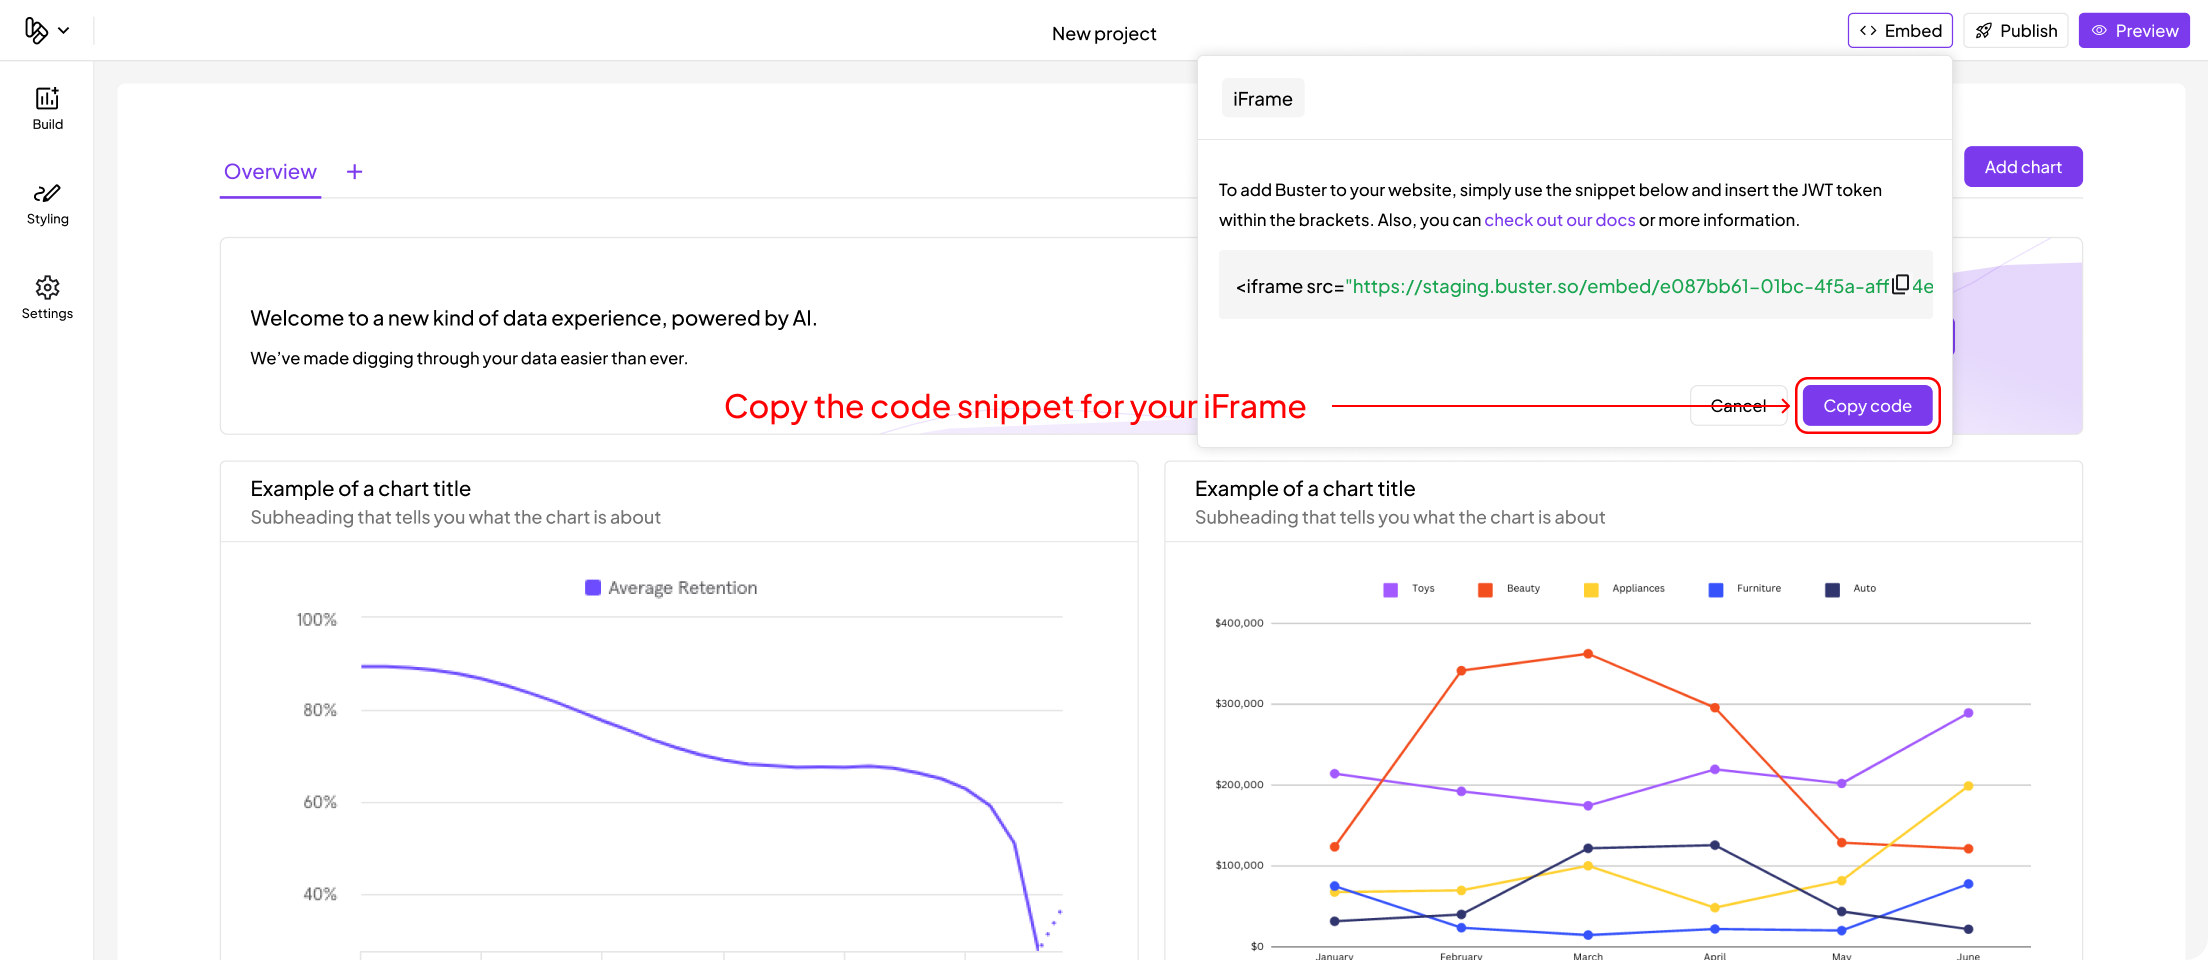
Chat Popup
Open a project -> click the “Embed” button in the top right -> Click Chat Popup -> click the clipboard icon to copy the code snippet. Be sure to replace YOUR_USER_JWT_TOKEN and YOUR_REDIRECT_URL with your user’s JWT token and redirect URL. The redirect URL is optional if you would prefer to open the chat popup in Buster’s dashboard. Here is an example of the code snippet:3. Authenticate the user
The embed URL contains ajwtToken query parameter. This is a JSON Web Token that is used to authenticate the user. We recommend fetching this token from your backend using your API key.
Refer to the API documentation for more information on how to generate a user auth token.
4. Inject the JWT into the iFrame URL
After generating the user auth token, you will need to inject it into the embed URL. You can do this by replacing the{} in the jwtToken query parameter with the user auth token.
NodeJS
NodeJS
auth.ts
Python
Python
auth.py
Ruby on Rails
Ruby on Rails
auth.rb
Rust
Rust
auth.rs
Go
Go
auth.go
Go
Go
auth.cs
5. Create loading state (optional)
If you want to display a loading state for the iframe (the chat popup already includes a loading state) while the embed component is loading, you can use theonload event to listener to toggle a loading state.
In practice, this would look something like this if were using React: